Table of Contents
What is PXE(Preboot Execution Environment)?
Preboot Execution Environment is a standardized client-server protocol that allows networked computers to boot and install operating systems over the network. It eliminates the need to manually install the OS on each individual machine, saving time and effort and particularly useful for thin clients, diskless workstations, or machines with faulty or missing storage devices and virtualized environments. It also helps mitigate security risks and aids compliance with industry standards and regulations.

How does PXE boot work?
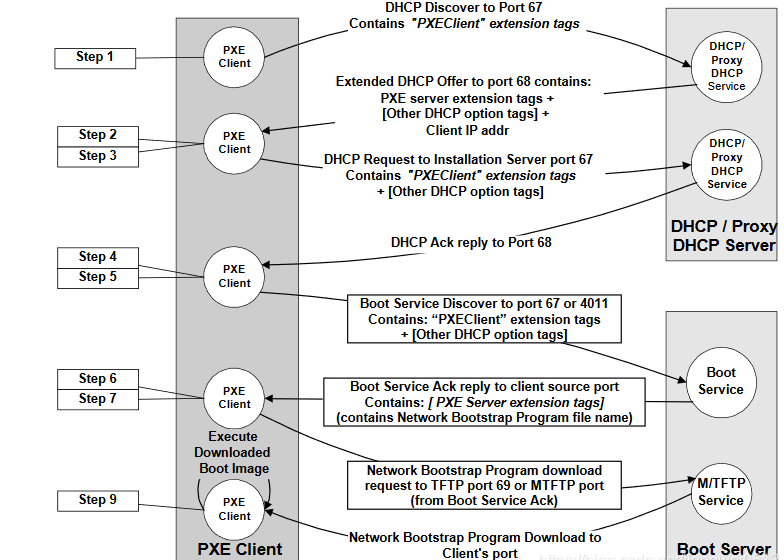
- When the terminal boots from the NIC, it sends a special request to the DHCP server on the local network.
- After receiving the PXE boot request, the DHCP server will send a DHCP response which contains the terminal’s network configuration information, as well as the IP address of the PXE boot server – TFTP Server
- After the terminal receives the DHCP response, it uses TFTP to download the boot file – pxelinux.0 or bootx64.efi – from the Server.
- The terminal loads and executes the boot file downloaded from TFTP. (The boot file is usually a small Linux kernel capable of connecting to a PXE server and obtaining an OS image)
- The PXE server sends the system image to the terminal.
- The terminal loads and executes the OS image, and runs it entirely from the network
The components required for PXE Server(the boot server) can all be deployed on any single Asterfusion CX-M switch.
-
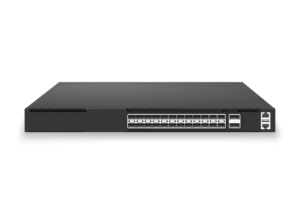 24x25G SFP28, 2x100G QSFP28 Uplinks, L3 Core/Leaf Switch, Enterprise SONiC Ready
 -
 24-Port 10Gb SFP+L3 Aggregation with 6-Port 100Gb QSFP28 Uplink Enterprise SONiC Ready
 -
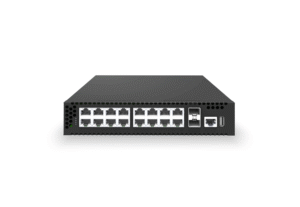
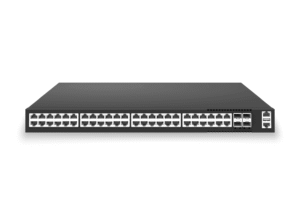 48x1G RJ45 L2/3 Access Switch, 4x25Gb/10Gb SFP28 Uplinks, Enterprise SONiC Ready
 -
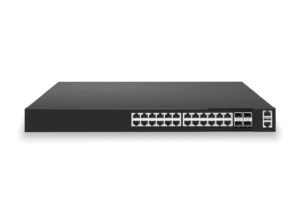 24x1G RJ45 POE+@370W L3 Access Switch, 4x25Gb/10Gb SFP28 Uplinks, Enterprise SONiC Ready
CX-M series are Asterfusion’s switch products designed for campus access and hyper converged enterprise networks. All of these switches are equipped with AsterNOS, an enterprise ready SONiC. Due to the advanced containerized software architecture, it is easy to deploy many customized services on the switch. Besides, there is a switch model with built-in processing card (as image below) that provides much more flexibility.

PXE Booting Configuration Process
Before you start, please notice the following things.
- The NIC needs to support PXE, and the terminal should configure BIOS in advance.
- In Legacy boot mode, the PXE client will request pxelinux.0; for UEFI boot, it will request bootx64.efi.
- You can also use nfsboot, which will download the ISO file and then install it.
Step 1: TFTP Installation & configuration
mkdir /home/admin/tftp
sudo apt install tftpd-hpa

sudo vi /etc/default/tftpd-hpa
TFTP_USERNAME=”tftp”
TFTP_DIRECTORY=”/home/admin/tftp”
TFTP_ADDRESS=”0.0.0.0:69”
TFTP_OPTIONS=”—secure -c”

admin@ASW-06:~$ sudo systemctl restart tftpd-hpa
Step 2: Preparing boot files
Create directory:
mkdir /home/admin/tftp/grub
mkdir /home/admin/tftp/boot
mkdir /home/admin/tftp/boot/live-server
Get the boot files:
apt-get download shim.signed
apt-get download grub-efi-amd64-signed
dpkg -x shim.signed shim
dpkg -x grub-efi-amd64-signed grub
cp ./grub/usr/lib/grub/x86_64-efi-signed/grubnetx64.efi.signed  /home/admin/tftp/grubx64.efi
cp ./shim/usr/lib/shim/shimx64.efi.signed  /home/admin/tftp/grub/bootx64.efi
grubx64.efi is the UEFI version of the GRand Unified Bootloader, which is a commonly used bootloader in Linux.
Get the kernel iso file:
You can download it directly from the official website, let’s take ubuntu-20.04.6-live-server-amd64.iso as an example (only the live version supports subiquity – the Ubuntu Server installer, which is installed automatically using cloud-init.).Then copy the iso file and configure file.
sudo mount ubuntu-20.04.6-live-server-amd64.iso /media
cp /media/casper/initrd       /home/admin/tftp/boot/live-server
cp /media/casper/vmlinuz      /home/admin/tftp/boot/live-server
cp /media/grub/font.pf2 /home/admin/tftp/grub
cp /media/grub/grub.cfg /home/admin/tftp/grubStep 3: Configuring HTTP server
mkdir -p /home/admin/http/autoinstall
mkdir -p /home/admin/http/iso
touch / home/admin/http/autoinstall/user-data
touch / home/admin/http/autoinstall/meta-data
mv ubuntu-20.04.6-live-server-amd64.iso /home/admin/http/iso/
sudo nohup python -m SimpleHTTPServer 8000  &
Step 4: Configuring boot files:grub.cfg & cloud.init
grub.cfg
vi /home/admin/tftp/grub/grub.cfg
if loadfont /boot/grub/font.pf2 ; then
       set gfxmode=auto
       insmod efi_gop
       insmod efi_uga
       insmod gfxterm
       terminal_output gfxterm
fi

set menu_color_normal=white/black
set menu_color_highlight=black/light-gray

set timeout=5
menuentry "Install Ubuntu Server" {
       set gfxpayload=keep
       linux  /boot/live-server/vmlinuz root=/dev/ram0 ramdisk_size=1500000 ip=dhcp url='http://10.230.2.200:8000/iso/ubuntu-20.04.6-live-server-amd64.iso' autoinstall ds=nocloud-net\;s=http://10.230.2.200:8000/autoinstall/ ---
       initrd     /boot/live-server/initrd
}
cloud.init
Cloud-init is an open source cloud initialization program that enables initial configuration of custom information (hostname, keys, user data, etc.)
Tip: It is recommended to install the OS manually so that an autoinstall-user-data file is generated in the /var/log/installer/ directory, which we can use as a reference. Passwords need to be encrypted and please pay particular attention to the disk partition configuration.The installation process log is saved in /var/log/installer/.
Step 5: DHCP configuration
Configure interface ip address
ASW-06# configure terminal
ASW-06(config)# interface ethernet 1
ASW-06(config-if-1)# ip address 10.230.2.200/24
Configure DHCP
sudo apt install isc-dhcp-server

sudo vi /etc/default/isc-dhcp-server
INTERFACEsv4=”Ethernet1”
#INTERFACESv6=””

sudo vi /etc/dhcp/dhcpd.conf
subnet 10.230.2.0  netmask 255.255.255.0 {
range 10.230.2.202  10.230.2.210;
option routers 10.230.2.200;
option broadcast-address 10.230.2.255;
default-lease-time 21600;
max-lease-time 43200;
allow leasequery;
next-server 10.230.2.200;
filename "bootx64.efi";
}
sudo systemctl restart isc-dhcp-server
These are all the steps to deploy a PXE server on an Asterfusion CX-M switch. Please contact us if you have any questions or are interested in our switch products.


